· Greg Young · Tutorial · 5 min read
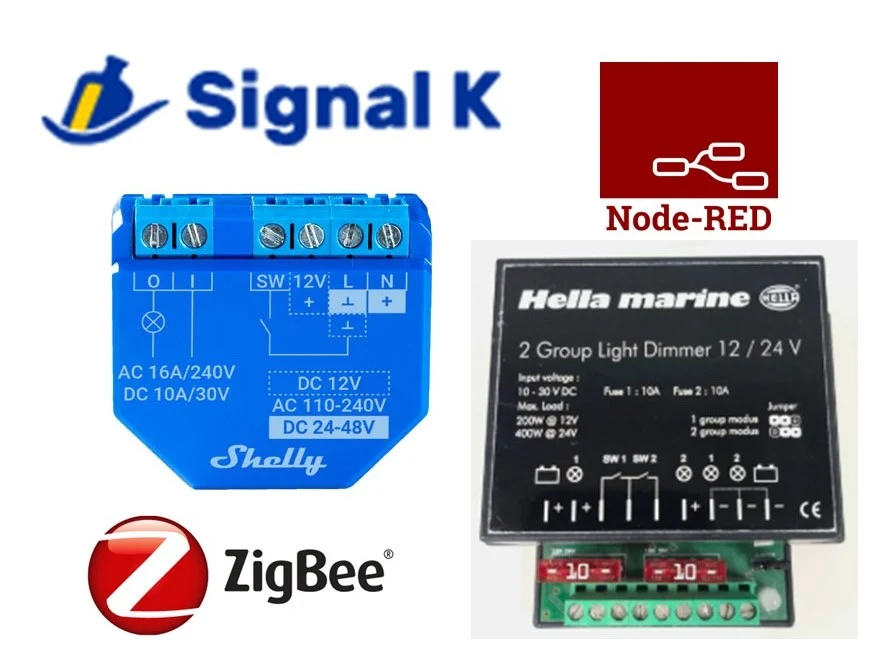
SignalK Automation of Hella LED Dimmer Module
Interface SignalK with an existing Hella Marine LED module to monitor and control LED lights.
Background
My boat is fitted with Hella Marine LED dimmer modules that use wall-mounted (hard-wired) push-button switches to control and dim the overhead LED lights.
The boat builder installed only a single wall switch, and its location is sometimes inconvenient. I wanted a second control switch location (without running new wiring throughout the boat), as well as the ability to control the lights via a motion sensor or any SignalK-connected display/control device (e.g., an iPad).
I wanted to retain the existing wall control buttons, but also add additional control options (extra switches) and automation via SignalK.
To achieve this, I needed a wireless (WiFi) module that could interface with SignalK, include an input to sense the current state of the lights (On/Off), and provide an output (momentary pulse) to control the Hella dimmer module.
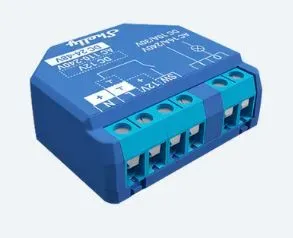
I selected a Shelly 1 Plus module for this purpose.
Shelly 1 Plus
Since my house electrical system runs on 24VDC, it was important to find a module capable of running directly from the existing light circuit.
A “24V” system under battery charging conditions can reach ~29V, which rules out many modules with more limited power supply specifications.
The Shelly 1 Plus can operate from 12V/24–48VDC, includes a single “switch” input, and provides a relay-based output.
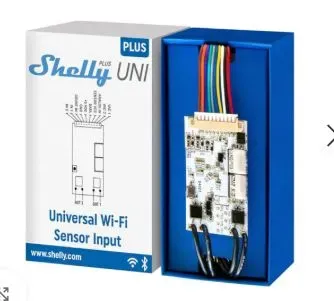
An alternative Shelly module that offers dual-channel capability (and could therefore control both Hella module circuits) is the recently released Shelly Uni.
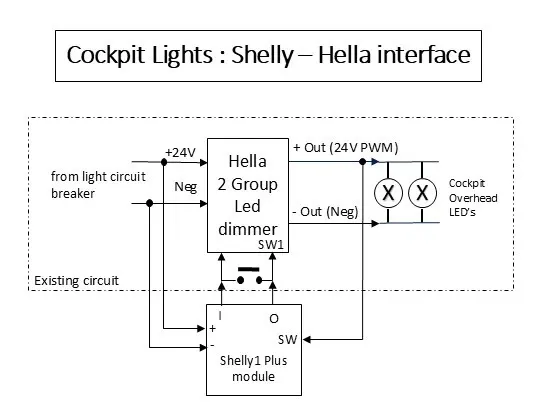
Interface Circuit
The Shelly 1 Plus is powered from the same lighting circuit as the Hella module.
Shelly input (SW) Connected to the existing Hella output circuit and used to sense the Hella state (On or Off).
Shelly relay outputs (O & I) Connected across the existing wall-mounted push-button switch to send a “pulse.” This creates a momentary short across the switch, which controls the Hella module.
Note: The Hella module dims the lights using PWM output. However, the Shelly input cannot detect the dim level—it only senses whether the lights are On. Likewise, the Shelly can only switch the lights On or Off; it cannot directly control Hella dimming. (In theory it could, but since it cannot detect the current dim level, this is not practical.)
Even though the Hella output to LEDs is pulse width modulated (PWM) for dimming operation, the Shelly input handles this correctly, and at all dim levels it senses the lights as “On.”
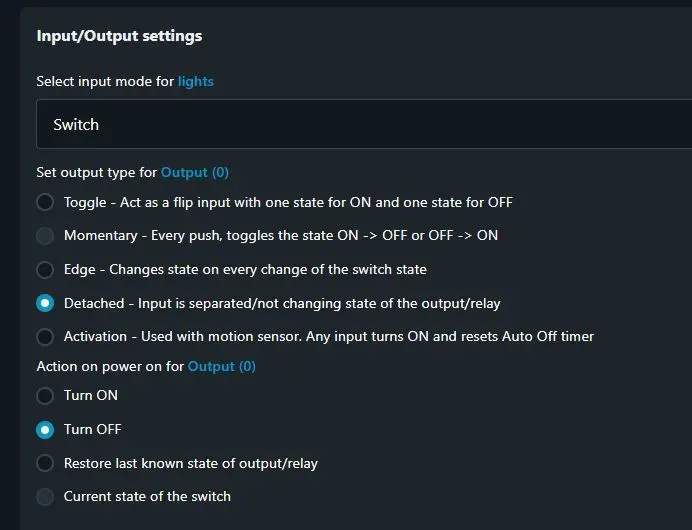
Configuring the Shelly Device
The Shelly device needs configuration, specifically to “unlink” the connection between its input and output. This is called a detached input (because the input is used independently of the output).
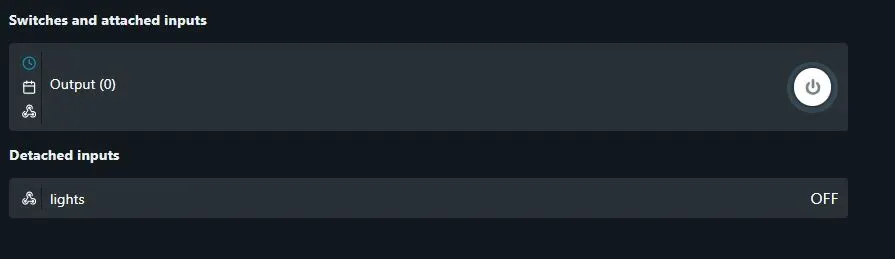
The home screen status will then appear as follows:
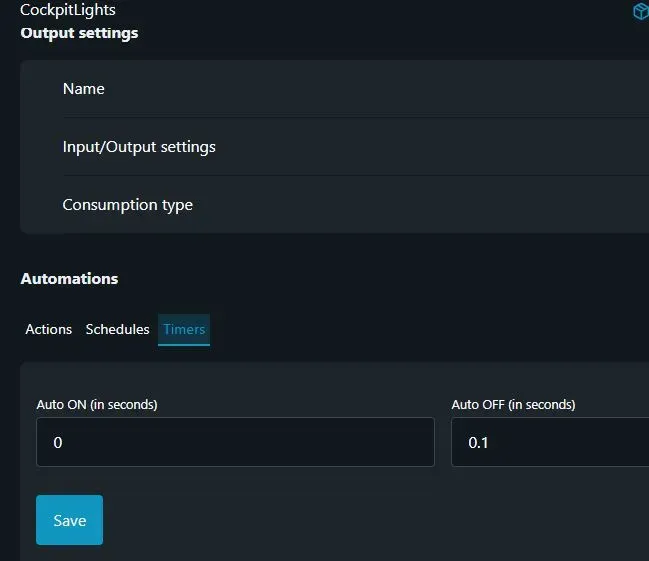
Since the Hella uses a momentary push button for control (to toggle On/Off), the Shelly must emulate this by pulsing its output. The timer function switches it off after 0.1 seconds.
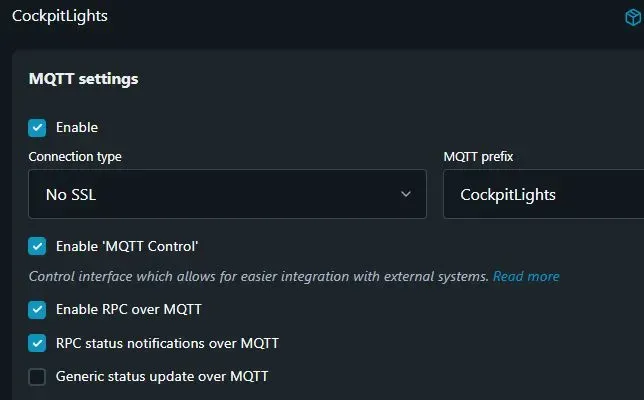
I chose to use MQTT connectivity between the Shelly device and the SignalK server (not via a Shelly plugin). Specifically, I used MQTT RPC (Remote Procedure Calls).
Zigbee Push Button (Tap) Switches

A Zigbee (wireless) button is used for control purposes. Each button supports three actions: tap, hold, and double tap.
Using a Node-RED flow, a short tap toggles the light On/Off.
For a detailed tutorial on integrating Zigbee wireless devices into SignalK SignalK Zigbee Sensors Tutorial
Zigbee Motion Sensors

A motion sensor in the outdoor cockpit area provides JSON data via MQTT. This is used within a Node-RED flow to switch the lights on for a period of time, subject to certain conditions.
Node-RED Flow for Motion Automation
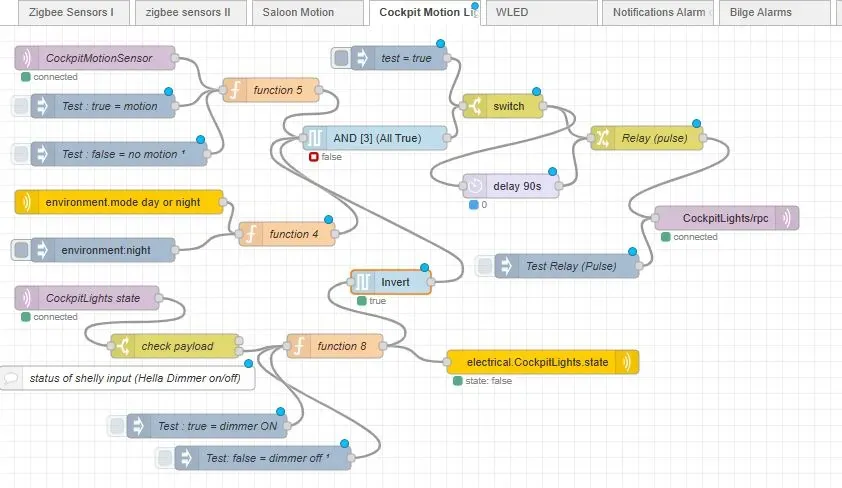
This Node-RED flow for motion-based control of the lights has several inputs for decision-making:
- CockpitMotionSensor (MQTT IN Node): receives status from the Zigbee motion sensor.
- environment.mode (day/night) (SignalK subscribe Node): populated by the
signalk-derived-dataplugin (so the AND gate output can only be true at night). - CockpitLights state (MQTT IN Node): reports the state from the Shelly input (SW pin). If the lights are On, this is inverted before input to the AND gate, so the logic only triggers if the lights are Off.
The AND gate output is only true if motion is detected, it is night, and the lights are currently Off. The delay (90s) Node then switches the lights off after 90 seconds.
- electrical.CockpitLights.state (SignalK send pathvalue Node): sets a path so the lights’ state can be displayed.
- CockpitLights/rpc (MQTT OUT Node): sends an “Output” message
ONto the Shelly, which then pulses its output for 0.1 seconds (simulating a button press).
Node-RED Flow for Zigbee Tap Button
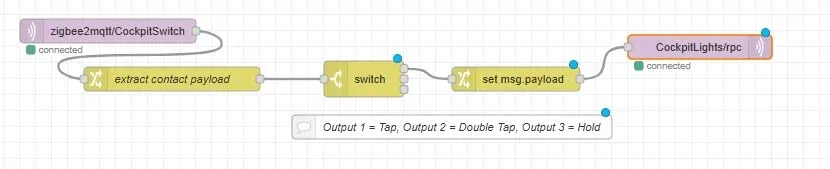
- zigbee2mqtt/CockpitSwitch (MQTT IN Node): receives the button action (e.g., tap).
- Extract contact payload: parses the JSON payload.
- Switch Node: has three outputs (tap, double tap, hold).
- Set msg.payload: formats the payload for the MQTT RPC message.
Summary
I was able to retain the existing Hella Marine dimmer modules and wall switch buttons. With the addition of a Shelly module, a Zigbee wireless motion detector, and a Zigbee wall button integrated into SignalK, I significantly extended the system’s functionality—introducing a level of intelligent boat automation for motion-controlled lighting.